As per my mine, Not All guy aware of capturing a full Screenshot in Mac OS X: Yosemite, EI Capitan, macOS Sierra, macOS High Sierra. By the way, With a screenshot, you can get the full-screen view with text and picture data. You can save your Mac screen’s important Text or Picture, and you would like to share it with someone then you can take a snapshot of your Mac OS screen and quick easy to share. Moreover great photograph like your highest score of the latest game, bug send to other for solving it.
Step for How to capture entire/ full Screenshot in Mac OS X: High Sierra, Yosemite & Windows
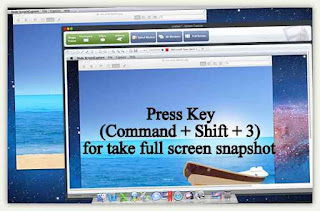
full screen screenshot in Mac OS X
Step #1. Open your Mac Screen which you want to capture for share or for keep save at a long time.
Step: 2. now on your keyboard â€" Press command + shift + 3 after that leave all the keys.
Step: 3. now you can see your Mac screen with notice the extra .png extension file this file contains words** screenshot.
Step: 4. in last do Double click on the notice file I mean words**screenshot file; you can launch this file in either image previewers or within image viewer which you most like. After click snapshot, you can also see you on your Mac desktop. At the moment you can share it or save on your Mac.
Note: are you using windows Keyboard, Use Shift + Windows + 3.
Related, Very Useful:
Change Default save path of the screenshot on Mac.
For Change Keyboard Shortcuts,
Also, we can change keyboard shortcuts for screen capture or screenshot on Mac, Go to the System Preferences > Keyboard > Shortcuts > Screenshots (Double click on shortcut key code).
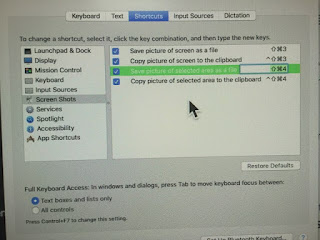
Change Screenshot keyboard shortcut on Mac (1)
How to capture specific area Screenshot on MacBook Pro/ Macbook Air/ iMac
Open on your Mac desktop, favorite apps, etc.; for particular area capture, it should not take more work like entire capture step.
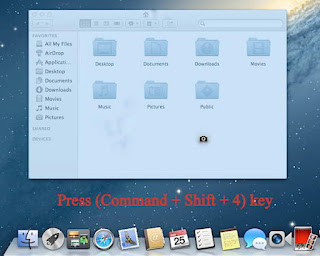
For Specific area of Screen, screenshot in Mac OS X (Yosemite)
Step: 1. Open with a screen which you would like for taking a snapshot: you can make this snap from anywhere it is your system screen or Web page anything whatever.
Step: 2. now look on your keyboard and press command + shift + 4 after that leave it all keys.
For Windows: Shift + Windows + 4
Step: 3. you will show that on your screen mouse courser; using courser you can choose a specific area for taking the snapshot. As well crosshair that you can move anywhere on the screen.
Step: 4. now Press down your cursor and drag the mouse over the area which you want to take a snapshot.
Step:5. After selecting the specific area release mouse. Finally, you got (screenshot in Mac OS X: Yosemite).png extension file that is your destination I mean which you want to take the specific snapshot.
Note: â€" Mac OS X v10.6 and later version, the screenshot in Mac OS X are saved as automatically PNG files on your Mac desktop. As well it saved with automatically named ‘’Screenshot (date & time).png. ’’
Extra Tip
macOS High Sierra Not working (Command Shift 4 Won’t Work)
Fix #1. Go to the System Preferences -> Keyboard -> Shortcuts
Select “Screen Shots†in the list at left…then make sure the shortcuts are checked.
Fix #2. First, You should Log out under the Apple in the Menu bar. then
Log into Guest user mode.
Can you take a screenshot in Guest? If no….
Now you will have to Boot into Recovery Drive and run Disk Utility > First Aid on your internal Macintosh HD.
Restart in Safe boot mode. Hold down the Shift key when restarting .
That’s it!
Useful: How to change apps icon size on iPhone, iPad â€" Resize app icon.
Like it and share with your friends even your friends will also get a new update regarding new tips & tricks, How to, iOS update and more.
No comments:
Post a Comment