Brief Introduction of the iPhone Data Recovery Software
It is a lifesaver for whom have lost important photos, SMS messages, contacts, videos in camera roll, notes and more files on iPhone (including iPhone 6 Plus. iPhone 6, 5S, 5C, 5, 4S, 4, 3GS, 3). It works on recovering iPhone lost data efficiently and quickly. You can easily download the free trial version first for a try. With simple installation and operation steps, you can preview your deleted or lost data on iPhone. To recover the data being able to preview, you just need to register to the full version. Only a few clicks to recover all your lost files from your iPhone.
Two Main Functions of this iPhone Data Recovery - Recovery & Backup
Reco very Function
It provides 3 recovery strategies to forensically
recover deleted or lost data from iPhone 6, iPhone 6 Plus, iPhone 5S, 5C, 5, 4S and previous models. Note that you should not use your device anymore as you realized the data loss because iPhone data recovery would be of no help when the space was overwritten.
Direct Recovery Mode: Recover Data from iPhone without Backup, from iOS Devices Directly
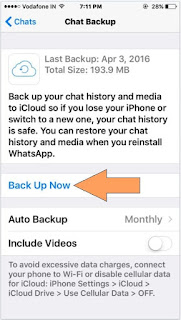
Backup Recovery Mode: You can recover lost or deleted files from both iTunes and iCloud backup. The premise is that you have an available backup to restore from and better a recent one.
 |
| 3 Recovery Strategies Provided by iPhone Data Recovery |
Literally, direct recovery mode is fit for those who don’t have a backup but their devices is available. It is also the preferred one unless your iPhone is lost, broken, and it is not available in hand because this mode ensures you to recover all files on iPhone while the backup recovery mode only recovers the files in your last backup, new data added after the last sync (which are not in the most recent backup) can’t be recovered.
With a variety of success stories, the software is highly popular in the market as
a recovery tool for iPhone. iPhone has large more and more like 64 GB, 128 GB memory space in which you can store thousands of personal documents like photos, videos, e-mails with attachments, text files, ringtones and other downloaded items. So it could be a great disaster when unexpected incidents happ ens. However, in case any data loss problem occurs or data on your iPhone gets corrupted, you can recover the lost information in time before the space rewritten with this iPhone recovery process.
Backup/Extract Function
 |
| Extract/Backup Data from iTunes Backup to Computer |
In order to get more memory space on iPhone, youd better save some certain files on local computer (Of course, someone would prefer to use cloud service to store the data). But we know, cloud has uncertain factors like data leakage by vicious attackers. So it is highly suggested to keep a local and safe data backup on local computer.
Except to free up space, every time you do adventurous operation on your iPhone such as iOS 8/7 update or iDevices jailbreak, you should backup your iPhone files in case data loss.
iPhone Data Recovery can help you copy/extract iPhone data to local PC/Mac. Therefore, you don’t need to worry about your iPhone suffers accident and the data may lose.
Note: Recoverable/extracted files include all Pictures, Videos in the Camera Roll, Text Messages, WhatsApp Messages and Chat History, Tango Messages, Contacts, Call History, Notes, Calendar Events, Reminders, Voice Memos, Safari Bookmarks, Messages Attachments.
How to Use the iPhone Data Recovery Software?
The steps is the same to recover lost data or backup data. The operation difference comes from different mode. Let’s learn respectively.Download th is software. And install it on your computer at first.
Mode 1: Recover Lost Files from iPhone Device without Backup
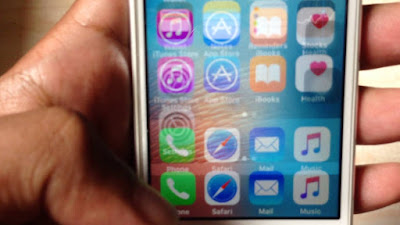
1. Run the program, in the main interface, choose the right mode†Recover Data from iOS Device†from the top menu.
2. Then connect your iPhone with PC. Enter DFU mode if you hold an iPhone 4/3GS//3, three steps offered in the interface, follow the prompt and the countdown timer given by the intelligent program.
3. Start to scan your iPhone files. Click “Start Scanâ€, then there will be a communicating process for scan.
4. Preview the recoverable files on your iPhone. In the left side of this interface, all the recoverable files such as call history, SMS attachments, camera roll and so on are listed by categories. Click a specific item, you can view the detailed information in the right pane.
5. Press “Recover†button and specify a location for the recovered/ extracted files to complete your work.
Mode 2: Recover iPhone Data from iTunes Backup
1. Choose the mode “Recover Data from iTunes Backup Fileâ€. Choose your device from the device list. If more than one devices ever synced in the computer, then all devices will display in the list, highlight your own one according to the name you specif it.
2. Click “Start Scan†to scan your iPhone files in the iTunes backup.
3. Preview your iPhone files. After the scan is done, all the recoverable files are listed in the left bar. Click your wanted ones to preview and mark them.
4. Recover your needed iPhone files with one few mouse clicks. When a window pops up asking for a save path for the recovered/extracted iPhone files, give a proper save path on your computer disk.
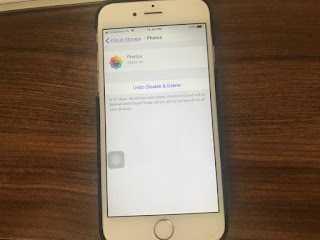
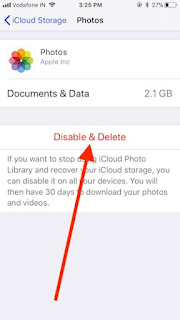
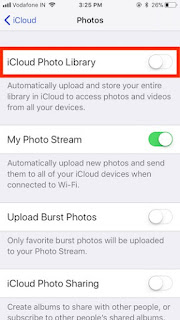
Mode 3: Recover Data from iCloud BackupIf you backed up your iPhone to iCloud, you can also restore deleted data from iCloud backup.
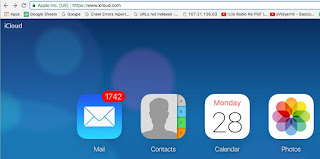
1. Select the recovery mode "Recover Data from iCloud Backup" and sign in iCloud with your account and password.
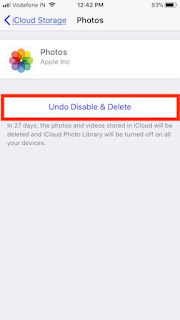
2. Choose the backup that you need to restore from then click "Next", it would start to download data from iCloud backup.
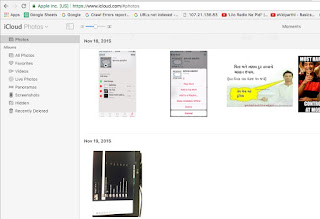
3. After download is done, you can choose your needed data to recover. Important note is that the download may take a few while if you have a big size data on iCloud backup, so wait for it to complete patiently.
Video tutorial for iPhone Data Recovery to give you a plain operation.
 < /div>


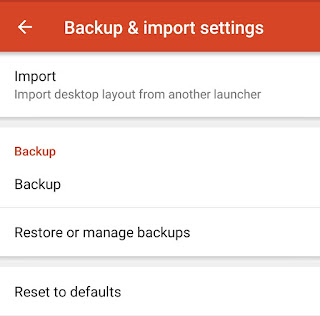
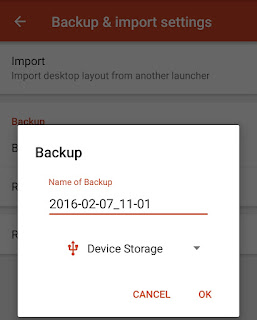
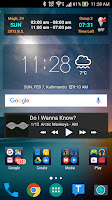 Many Android users spend a lot of time setting up their smartphone or tablets desktop with useful widgets and quick access folders for different category of apps. However, this desktop layout/design will get lost if you or someone accidentally changes it. Then youll have to again spend time putting those items on the desktop. The feature to save the home screen layout isnt inbuilt on Android devices so users will have to use a third party launcher app like Nova, APEX, GO etc instead which provide such desktop backup/restore feature. Below are the steps on how to backup your Android desktop layout using NOVA launcher: